Installing Windows
This guide will walk you through installing Windows 11 on your computer, using AME Beta to create a bootable USB drive. It’s simple and ensures your system is ready for Privacy+ or any other playbooks.
Important
If you have an existing Windows installation and want to apply Privacy+ to it, you can skip this page and follow the preparing windows guide.
Before You Begin
You’ll need:
A USB drive (8GB or larger)
An internet connection (to download an ISO directly, if needed)
AME Beta version 0.8 or newer Download here
Creating a Bootable USB Drive
Follow these steps to create a bootable USB drive for Windows 11 using AME Beta:
Open AME Beta on your computer by double-clicking the AME Beta icon or running it from the start menu.
Add a Windows 11 ISO to the sidebar. To download one, click an empty slot, select “Download ISO,” choose “Win 11” from the dropdown, and wait for the download to complete.
Tip
You can also drag an existing Windows 11 ISO file into the drop zone from Windows Explorer.
Select your USB drive from the list in AME Beta, ensuring it has at least 8GB of space and is the correct drive to avoid data loss.
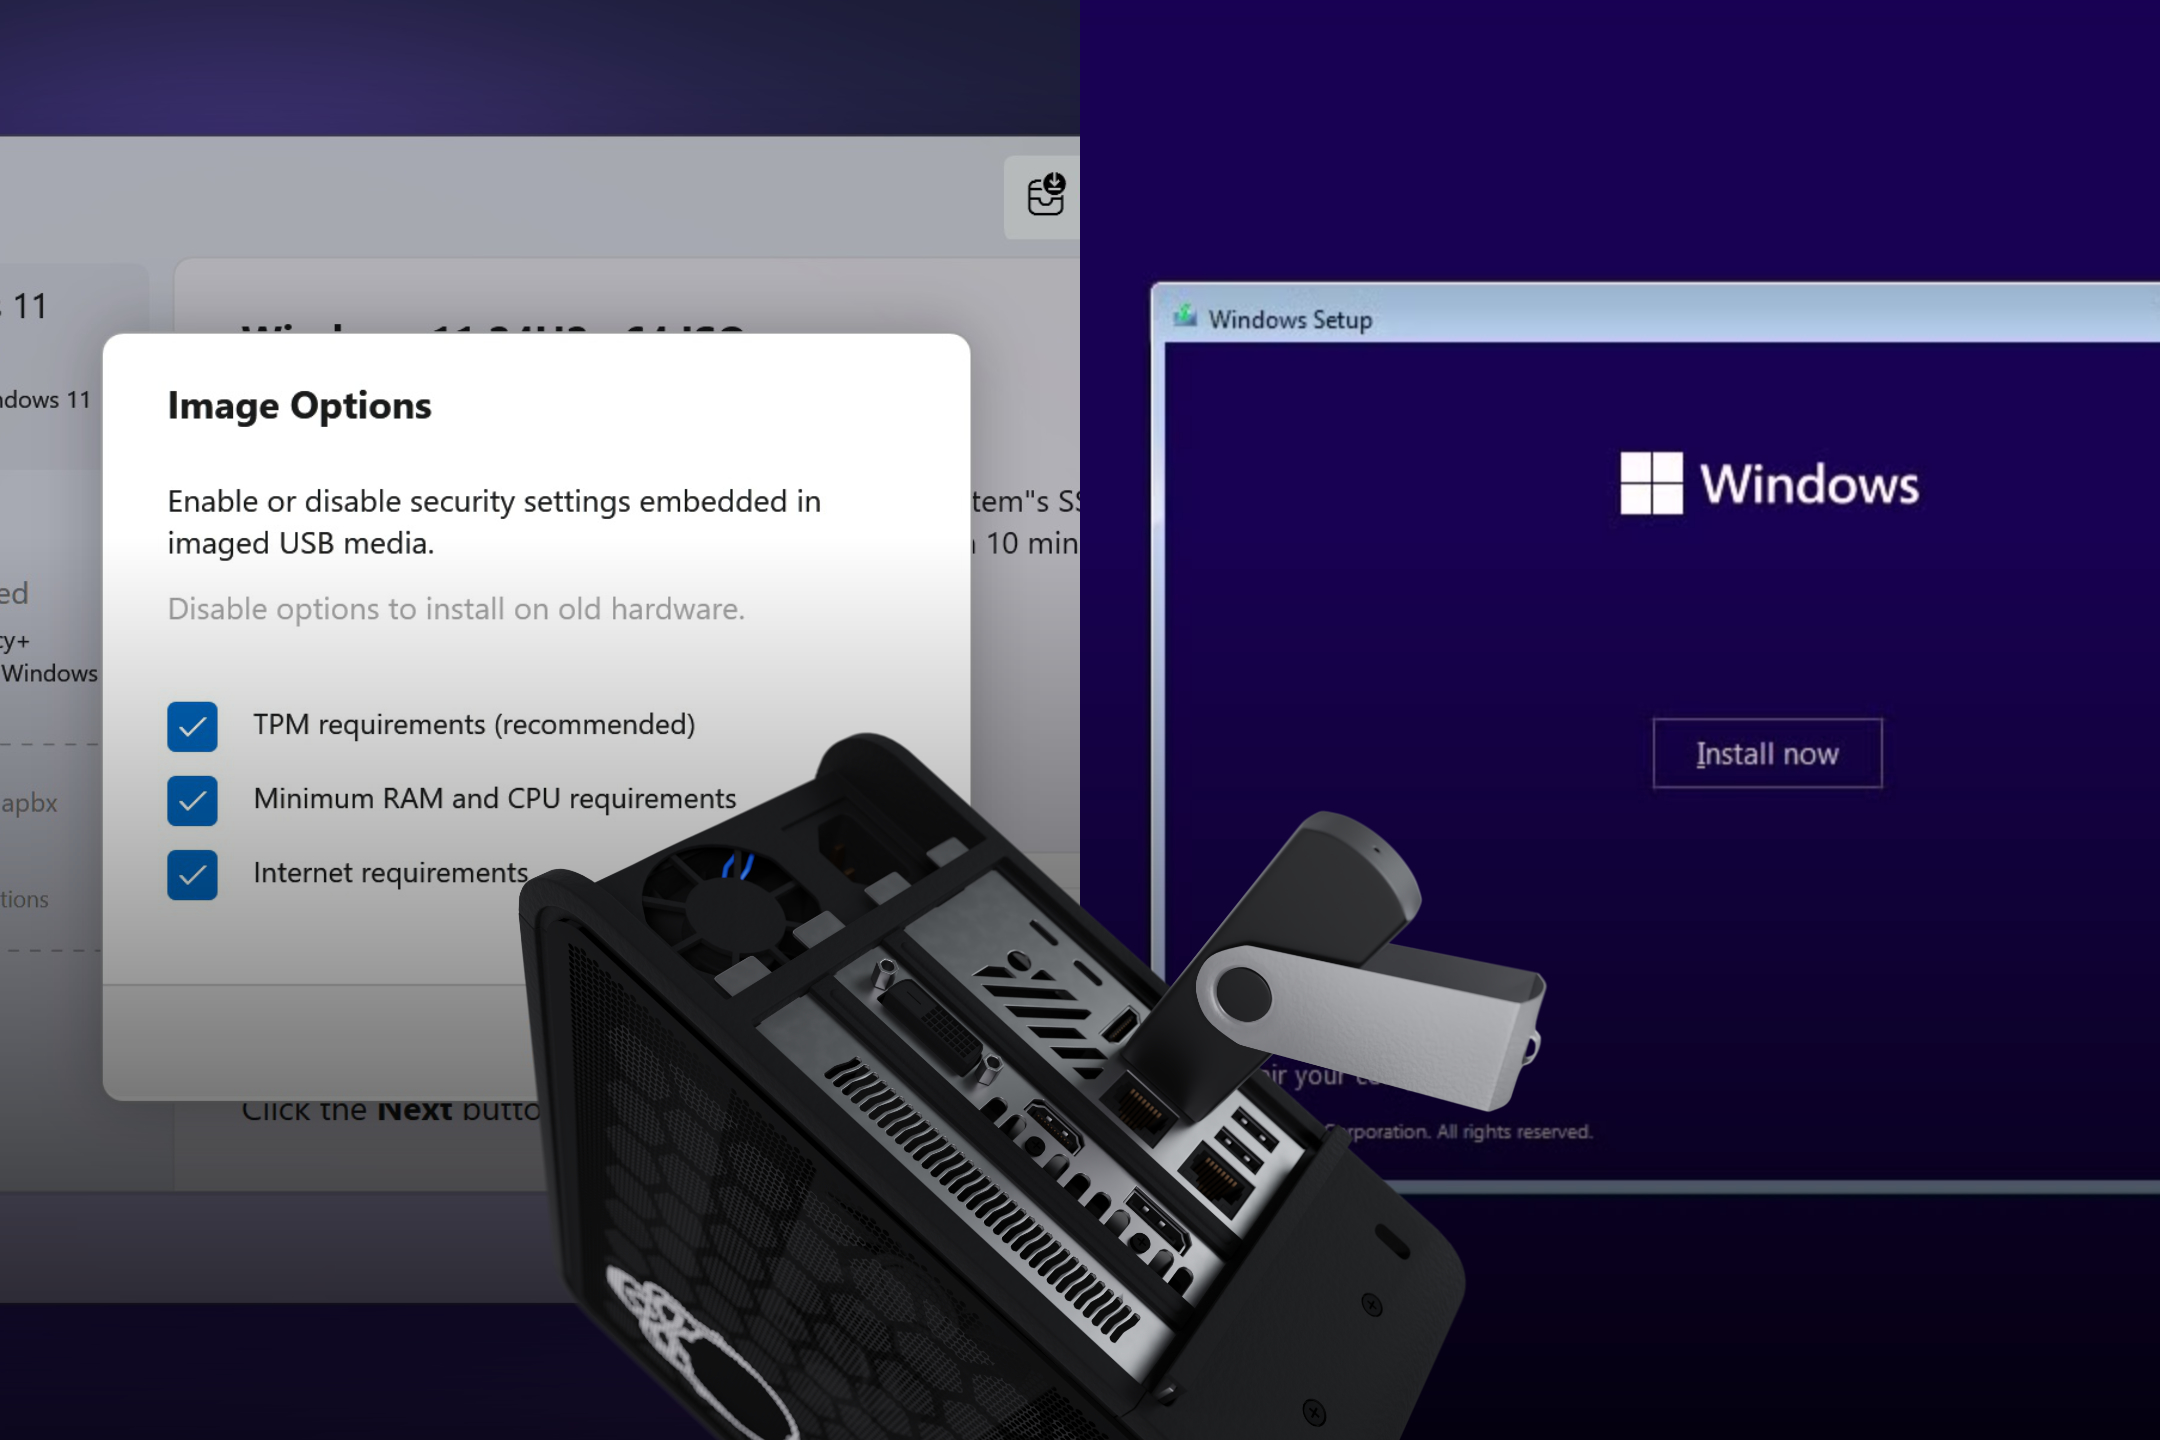
Click “Next” to proceed to the configuration screen.
Confirm that the internet requirement for OOBE is already removed on the configuration screen, a default setting for Windows 11 ISOs.
Note
AME Beta enables Windows 11 to run on “unsupported hardware” bypassing certain requirement and eliminating the need for Windows 10.
If needed, click “Manage image” to remove additional checks like TPM or minimal RAM requirements.
Finally, click the “Next” button to start writing the ISO to the USB drive.
Wait for the process to finish, monitoring the progress bar in the new ISO writing window.
Remove the USB drive once the progress indicates completion, no secure ejection needed.
Writing ISO Guides
For more information on writing ISOs with AME Beta, check this guide:
Setting Up Windows
Installing Windows 11 from a USB drive involves a series of steps to boot, prepare, install, and configure your system. Follow this guide carefully to ensure a smooth setup.
Warning
These steps will erase all data on the selected disk. Back up any important files before proceeding.
Booting from the USB Drive
This step ensures your computer starts from the USB drive to launch the Windows installer.
Insert the USB drive and restart your computer.
Watch for a message during startup showing which key opens the boot menu (e.g., F12, Esc, or F8), then press it.
If no boot menu appears, enter BIOS/UEFI (usually via Del or F2), set the USB as the first boot device, and save changes—check your device’s manual for specifics.
Once the USB boots, the Windows installer will load.
Preparing the Disk
Wiping the disk creates a clean slate for Windows, avoiding issues from old partitions.
When the installer appears, press Shift + F10 to open a command prompt.
Type
diskpartand press Enter.Tip
Using
diskpartensures all data and partitions are fully removed, including potential RAID remnants, or mismatched partition tables, making the installation more reliable.Type
list diskto see all disks, then identify your target disk’s number (e.g., Disk 0).Type
select disk <number>(e.g.,select disk 0) and press Enter.Type
cleanto erase everything on the disk.Type
exittwice to close the prompt.If you already progressed to the disk section in the installer, click “Refresh” to update the disk list, otherwise continue with installing Windows below.
Installing Windows
This process installs Windows onto the freshly prepared disk.
Choose your language and region, then click “Next.”
Click “Install now.”
Enter a product key or select “I don’t have a product key” and select Windows 11 Pro from the list of available editions to proceed.
Note
Windows can be installed and used without a product key, and activated later in Settings. By continuing you agree that you have a valid product key or can otherwsie activate via legitimate means.
Accept the license terms and click “Next.”
Select “Custom: Install Windows only (advanced).”
Pick the unallocated space on your cleaned disk and click “Next.”
Completing the Setup
Finalizing the setup configures Windows 11 for first use through the Out of Box Experience (OOBE), preparing your system for the Privacy+ Playbook.
Wait as the installation begins; your system will restart several times—this is normal as Windows configures itself.
Follow the OOBE prompts to set up your system.
Select your region and keyboard layout when prompted.
Important
During OOBE, select “I have no internet” (enabled by AME Beta during ISO creation; disconnect Ethernet and skip Wi-Fi) to avoid online setup. Regardless, AME Beta will prompt you to convert a Microsoft account to a local accoubt when installing Privacy+.
Enter a name for your device and create a user account with a password.
Adjust or skip privacy settings as desired during OOBE.
Note
Your privacy setting choices here don’t matter, as the Privacy+ Playbook will remove all data collection processes and override these settings completely.